Lists
Lists helps you benefit from your efforts in undertaking online or offline analysis to determine and mitigate fraud in online payments. Lists is a space where you can provide details you identified as fraudulent and illegitimate that helps you automatically approve, reject, or review a payment.
You must be sure about the details you add to lists. Because lists are used to assist in longer term decision making on transactions. It might impact all transactions in future.
Lists lets you block or allow any of the following information types.
- IP is the IP address of the device from which the transaction was performed.
- Email is the email address associated with the payment that was provided at the time of transaction on your website and was passed over to Fraud Protection Advanced. This would be blank for any transaction where you do not pass the customer’s email address to Fraud Protection Advanced.
- Email Domain is the domain of the “Email” associated with the payment.
- Phone is the phone number associated with the payment that was provided at the time of transaction on your website and was passed over to Fraud Protection Advanced. This would be blank for any transaction where you do not pass the customer’s phone number to Fraud Protection Advanced.
- Card BIN denotes the first 6 or 8 digits of the card number which identifies the card issuer.
- Card Hash is the encrypted card number that was used for the transaction. It is unique to each card.
- Shipping ZIP is the zip code mentioned in the shipping address.
- Shipping Country is the country mentioned in the shipping address.
- Shipping Address is the shipping address that has address lines, admin areas, zip or postal code, and country code details. The different parts of the shipping address must be entered in comma separated values in the following order:
- Address line 1 - Street Address
- Address line 2 - Extended Address
- Admin area 2 - City / Town
- Admin area 1 - State / County / Province
- ZIP / Postal code
- Country code
Note: In case you want to add multiple addresses, you can add one address per line. However, in case of a single address, the parts of the address are separated with comma separated values.
- Billing ZIP is the zip code mentioned in the billing address.
- Billing Country is the country mentioned in the billing address.
- Billing Address is the billing address that has address lines, admin areas, zip or postal code, and country code details. The different parts of the billing address must be entered in comma separated values in the following order:
- Address line 1 - Street Address
- Address line 2 - Extended Address
- Admin area 2 - City / Town
- Admin area 1 - State / County / Province
- ZIP / Postal code
- Country code
Note: In case you want to add multiple addresses, you can add one address per line. However, in case of a single address, the parts of the address are separated with comma separated values.
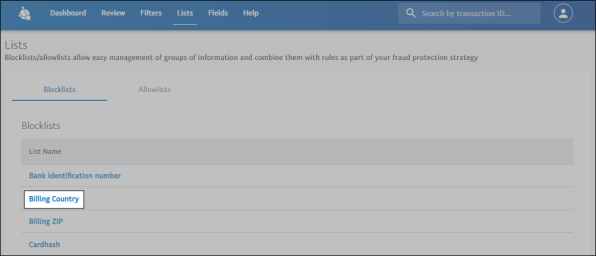
Lists provides readymade Blocklist and Allowlist for each information type—you just have to add corresponding items to the lists respectively. In Blocklists, you can add items having fraud history and in Allowlists, you can add items associated with good payments. You can always keep updating the lists by adding or removing items. After you have the lists ready, you can then make use of them in filters.
For example, you noticed that the email addresses, [email protected], [email protected], and [email protected], are associated with fraudulent payments. Add such email addresses to the Email Blocklist. Similarly, add email addresses associated with good payments history to the Email Allowlist.
Now you create a filter to check any of the new payments happening on your website or mobile app is associated with any of the email addresses in the Email Blocklist and reject such payments automatically. Similarly, you can create another filter to check and automatically approve payments associated with the email addresses in the Email Allowlist.
Note: The data match of 'String' and 'Text' variables to fields are not case-sensitive for Blocklists/Allowlists. The data is stored and viewed in the case entered by you. This is applicable for all the Blocklists/Allowlists items.
Add Items to Lists
In Blocklist or Allowlist of any information type, you manually add corresponding items you noticed bad or good in your analysis to the lists respectively.
To add items to the Blocklist of an information type:
- Open the Lists page. The BLOCKLISTS tab is opened by default.
- In Blocklists, click the information type to which you want to add items.
- Ensure ALL ITEMS tab is open.
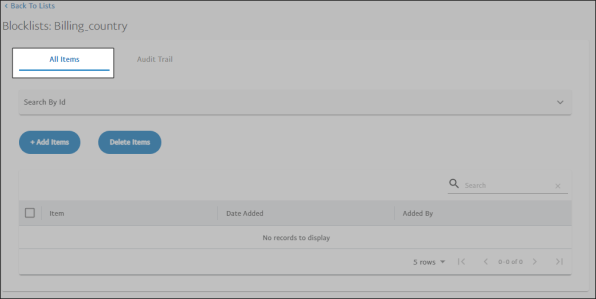
- Click Add Items. The Add Items To List pane opens to the right.

- In the Add Items To List box, add items using any one of the following separator:
- Comma: Put a comma after each item as a separator.
- Newline: Press Enter key after each item to put items one per line.
- After adding items, click Apply. The items get added to the Blocklist of the selected information type.
To add items to the Allowlist of an information type:
The procedure to add items to the Allowlist of an information type is the same as adding items to a blacklist. You just need to select the ALLOWLISTS tab on the Lists page instead of the BLOCKLISTS tab. The remaining steps are the same.
Audit Trail
Lists allows you to add or remove the attributes associated with payment transactions from Blocklist and Allowlist. The Audit Trail in Lists keeps a track of operations (addition and removal) performed on attributes in each information type.

Note: The Audit information is delayed by a day's time. You would not be able to see the items in audit log that were added in the last 24 hours.
It provides the following details for every Blocklist and Allowlist.
- Item: Displays the attributes that were added or removed from Blocklist or Allowlist
- Modification Date: Displays the dates of the operations done
- Modification By: Displays the email addresses of users who performed operations
- Operation: Displays names of the operations performed
To view audit trail of a list:
- Open the Lists page. The BLOCKLISTS tab is opened by default.
- In Blocklists or Allowlists, click the information type (for example, Email, Phone, Card BIN, so on) of which you want to view the audit trail. The selected information type page opens.
- Click the AUDIT TRAIL tab. The modifications done to the attributes in the selected information type are listed.
Search List Items
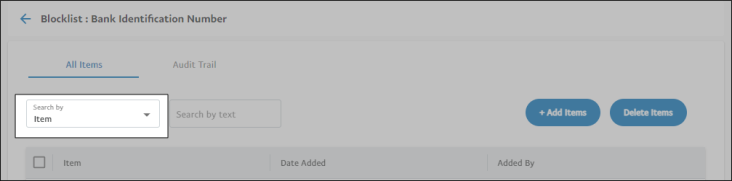
The Search option in Blocklist/Allowlist lets you search for a particular attribute and exclusively view its audit details. For example, to view only modifications that have been done to a particular Bank Identification Number so far.
You can search by:
- Item
- Date Added
- Added By
- Go to any Blocklist/Allowlist item.
- In the All Items or Audit Trail tab, select the search criteria from the Search by drop-down.
- Enter the search text in the Search by text box if the search criteria is Item or Added By.
- Or, select the From and To dates from the calendar options if the search criteria is Date Added.
Bulk Upload of List Items
In Blocklist or Allowlist of any entity, you can bulk upload items to the Lists when the number of items to be added are more than 1000.
To bulk upload items to the Blocklist of an information type:
- Open the Lists page. The BLOCKLISTS tab is opened by default.
- In Blocklists, click the information type to which you want to add items.
- Ensure ALL ITEMS tab is open.
- Click Add Items. The Add Items To List pane opens to the right.
- Click Download Template under the Bulk Upload section to download a sample
.csvfile.Note: Only
.csvfile format is allowed for bulk upload of items to a list. Use the downloaded sample.csvfile template to avoid any errors during bulk upload of populated items. - Populate the downloaded template with the items you want to upload for a Blocklist.
- Click Bulk Upload under the Bulk Upload section. The Bulk Upload window appears.
- Choose or drag and drop the file that you want to use for bulk upload. The bulk upload process starts automatically.
Note: The Data has header check box is enabled by default, and visible for all lists except Billing and Shipping Address. It is mandatory to use the default format with headers for Billing and Shipping Addresses. If the
.csvfile does not have headers, clear the Data has header check box.
To bulk upload items to the Allowlist of an information type:
The procedure to bulk upload items to the Allowlist of an information type is the same as bulk uploading items to a blocklist. You just need to select the ALLOWLISTS tab on the Lists page instead of the BLOCKLISTS tab. The remaining steps are the same.
View Bulk Uploads
The View Uploads drop-down appears in the Lists page after you have initiated at least one bulk upload.
The View Uploads drop-down can have two statuses:
- Ongoing processing: If one or more files are under bulk upload process, an icon with the count of files under process is displayed.
- No ongoing processing: An upload icon is displayed.
However, the individual bulk uploads in the View Uploads drop-down can have four statuses:
- Completely successful - All items in the
.csvfile were uploaded successfully. - Partially successful - The processing was successful, and one or more items in the
.csvfile failed to upload. - Processing - The
.csvfile is processing in the back end. - Processing failed - The
.csvfile processing has failed.
Note: You can download the summary for the respective uploads. The download icon is available for Completely successful, Partially successful, and Processing failed cases.
View Uploaded Items
All the items for a Blocklist or Allowlist that were uploaded successfully are displayed in the All Items and Audit Trail tabs. The items uploaded through bulk upload feature will have a different operation name: 'Blocklisted with Bulk upload' and 'Allowlisted with Bulk upload' for Blocklist and Allowlist respectively.